Manually Creating Product Groupings (Competitive vs Complementary)
Last updated: December 6, 2025
This articles outlines the manual steps required to label HG technographics with custom values, and to populate those product installs into custom fields.
The following guide uses sample files and product values. Please remember to change these names while building your own version.
1. Create a picklist field with two values on the Technographic object named TechType__c
3. Create a trigger referencing the TechType__c field
4. Create a new apex class named PopulateTechnographicRecordsBatch and paste below piece of code
5. Run this batch job to populate the TechType__c field we created on the Technographic object
1. Create a picklist field with two values on the Technographic object named TechType__c
- Navigate to Object Manager→ HG Technographic Object → Fields & Relationships Tab
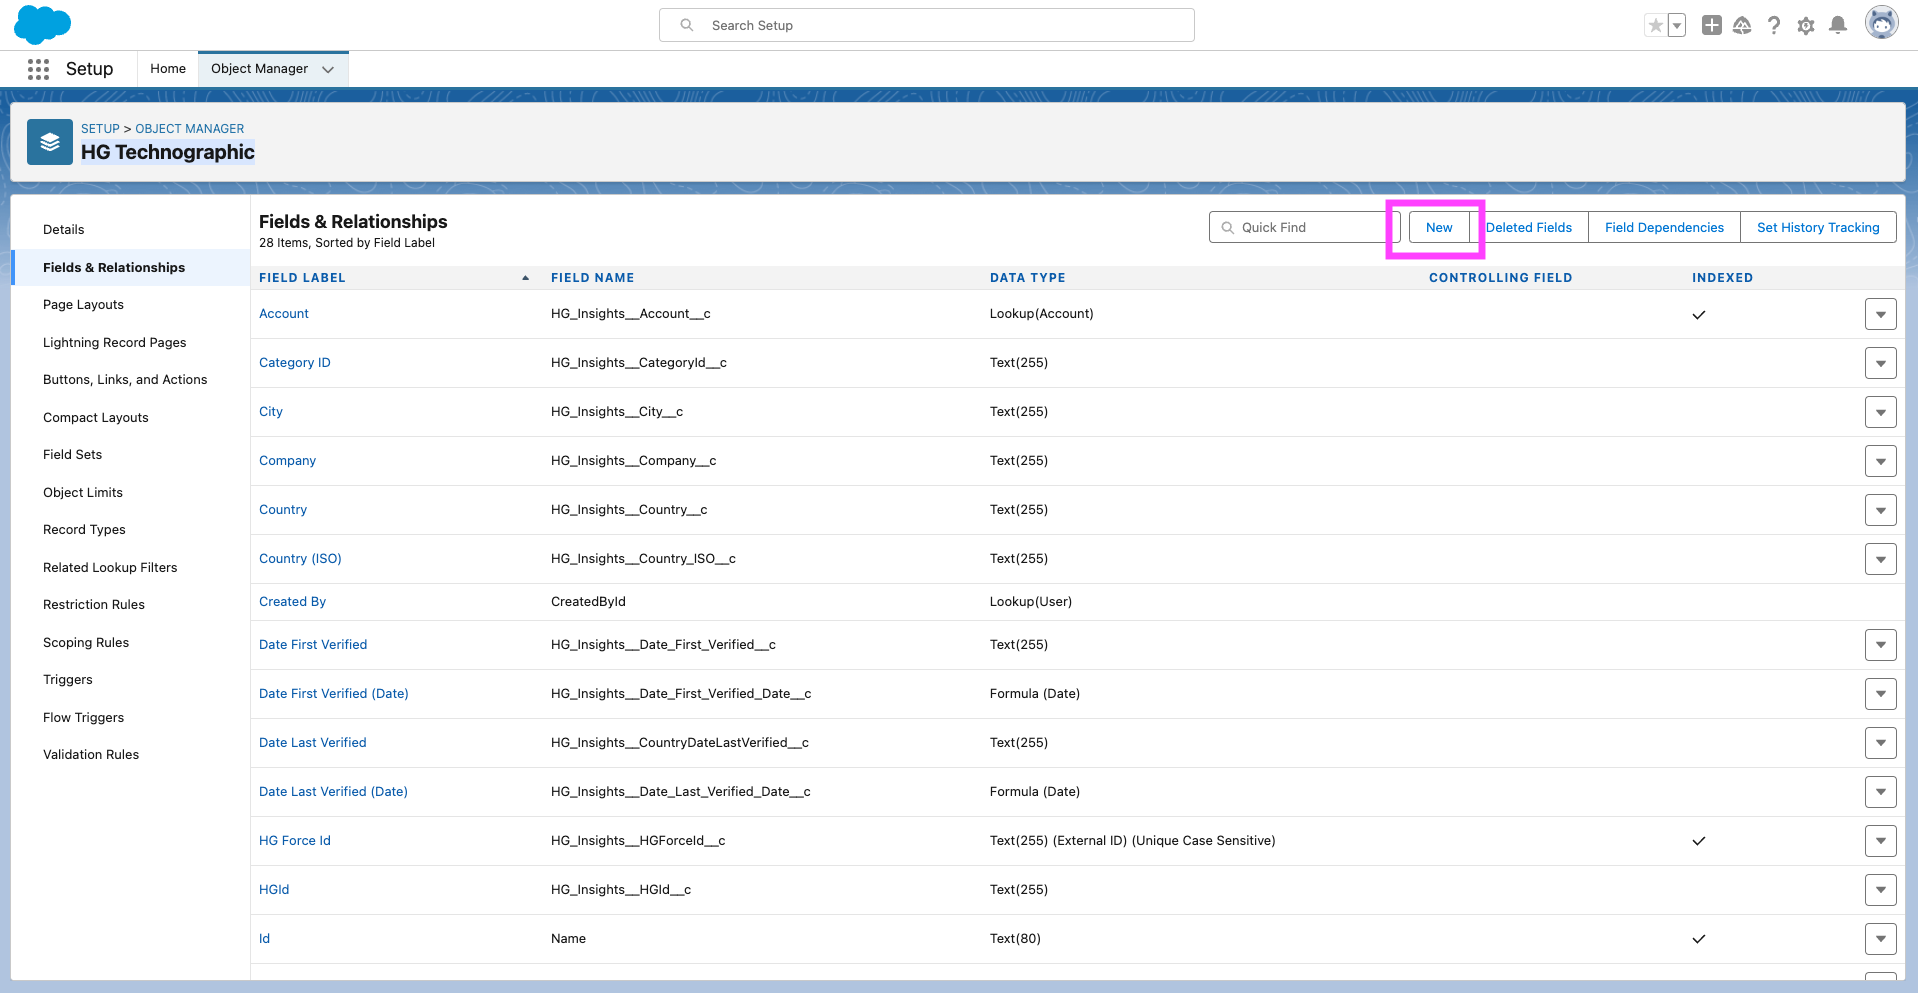
- On Fields & Relationships click New in the top right and follow the prompts
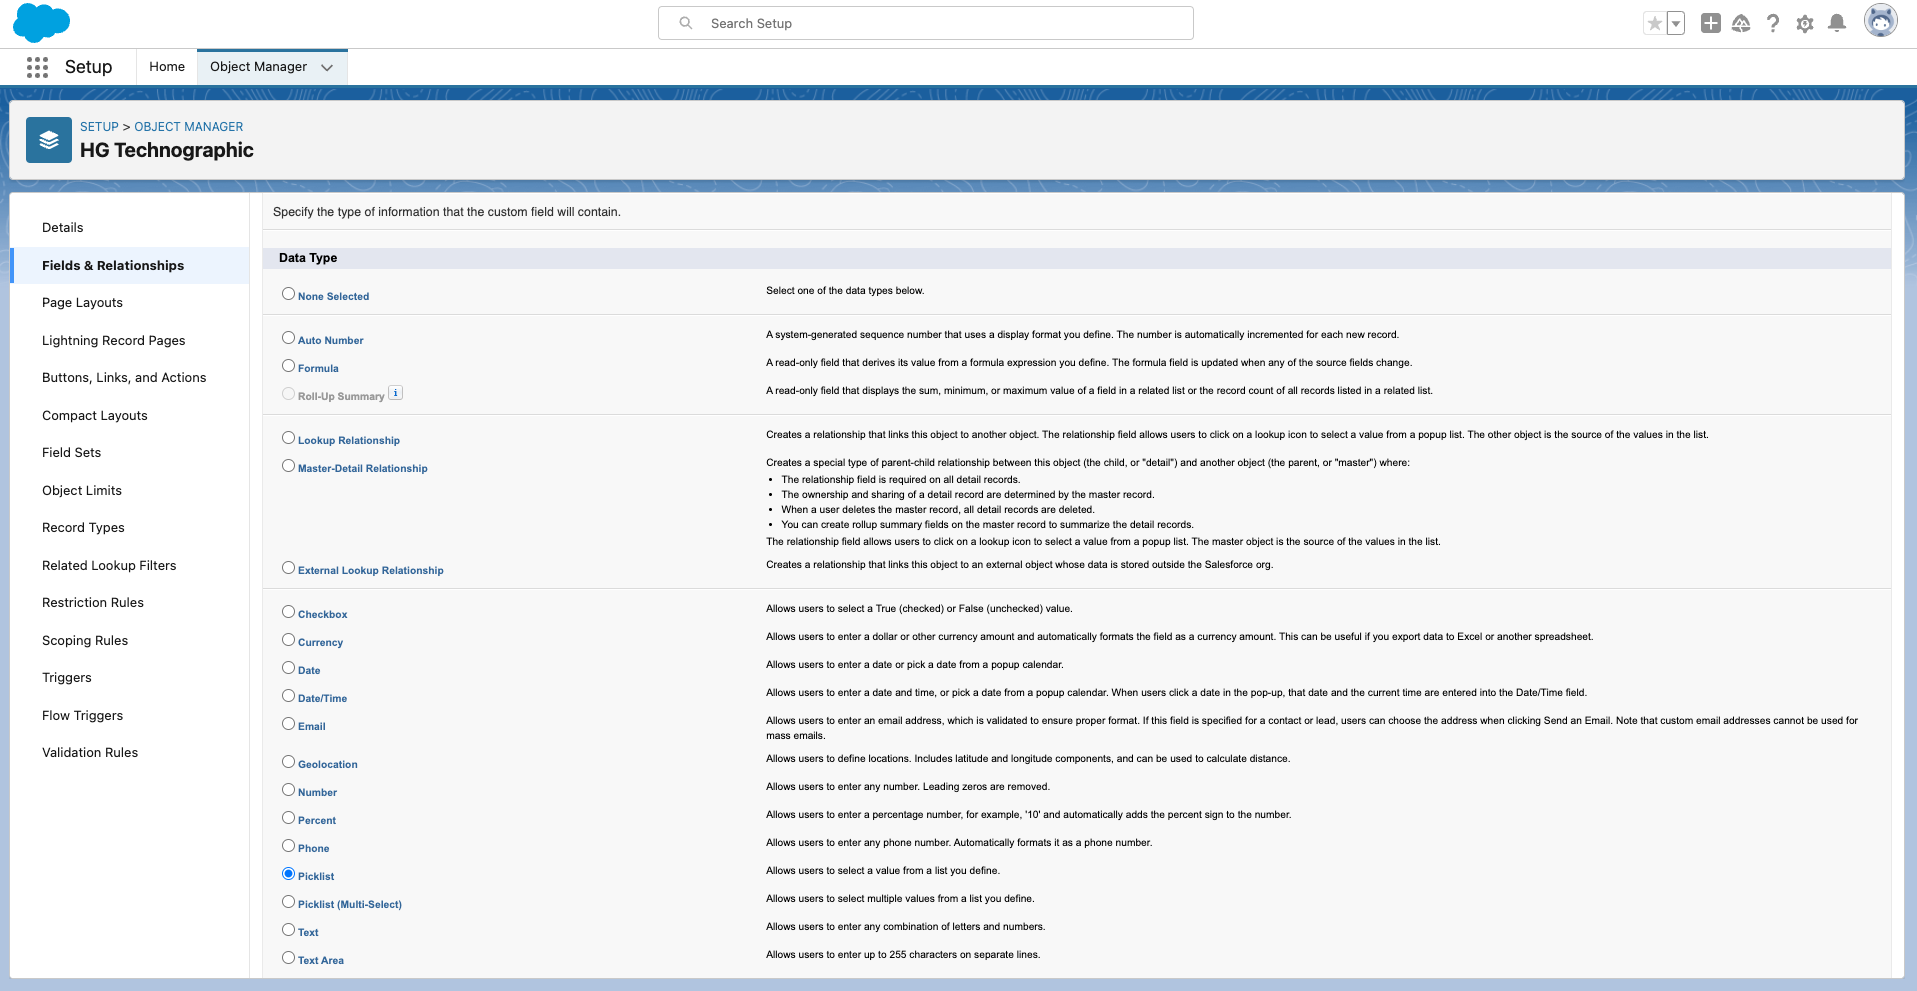
- Data Type should be Picklist
- Values should be Competitor and Complementary
- Set field level permissions
- Add to the Technographic page layout

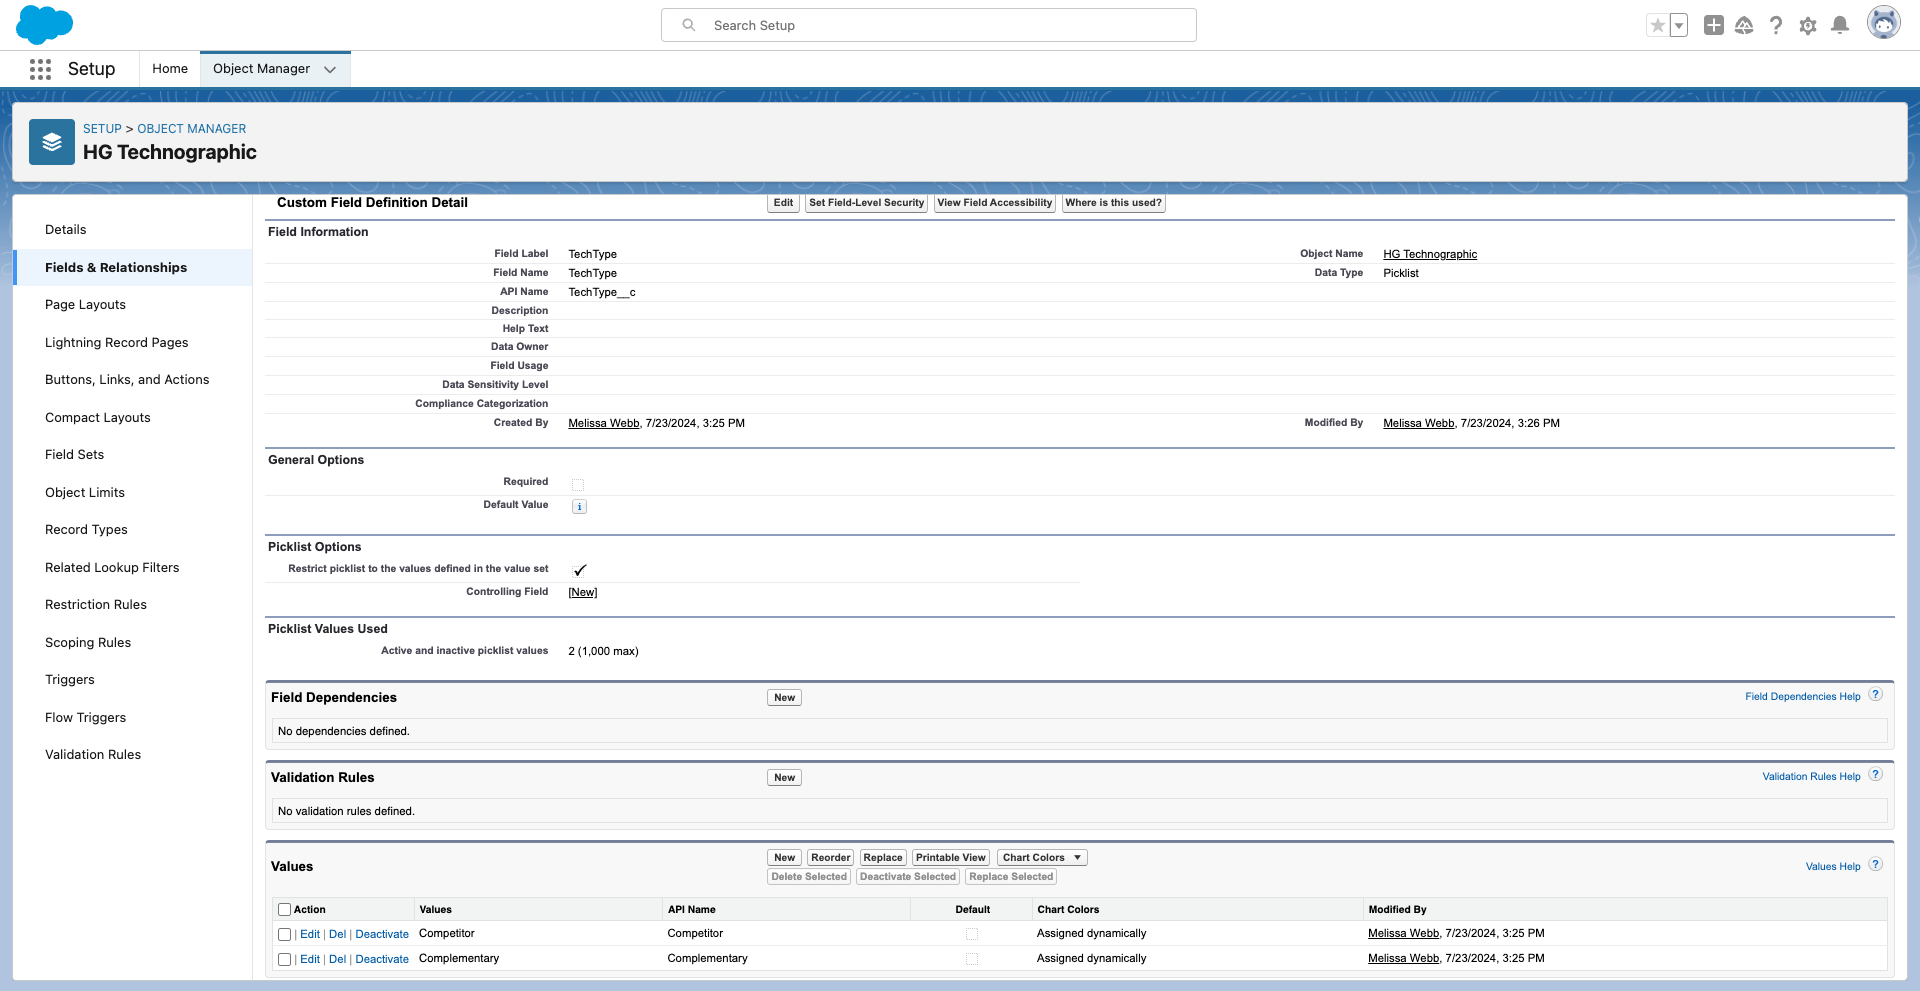
- Final field should look something like this →
2. Create two new fields on Account object named Competitor_Tech_Products__c and Complementary_Tech_Products__c that will sum all technographic products marked accordingly.
- Navigate to Object Manager → Account Object → Fields & Relationships Tab
- On Fields & Relationships click New in the top right and follow the prompts - you're going to do this twice.
- Data Type should be Text Area(255)
- Name one Competitor Tech Products
- Name the other Complementary Tech Products
- Set Field Level Security, Dynamic Forms and Pages Layouts

3. Create a trigger referencing the TechType__c field
- Navigate to the Developer Console
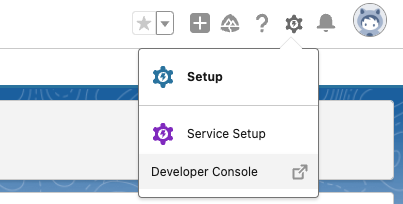
-
File → New → Apex Trigger
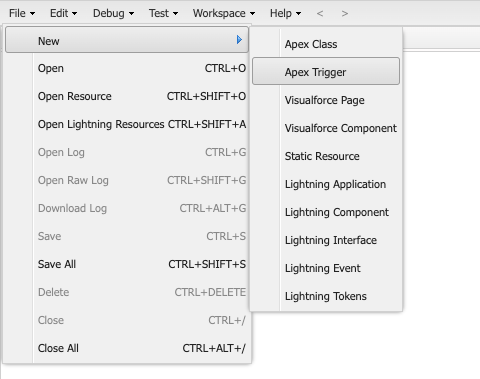
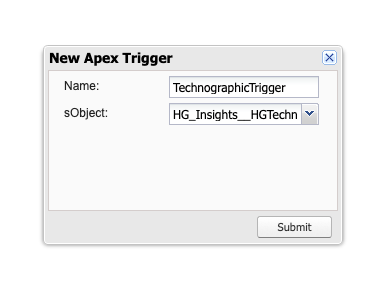
- Name this TechnographicTrigger
- For Object select HG_Insights__HGTechnographic__c (this is the second one, make sure you don't select the one that ends with ChangeEvent)
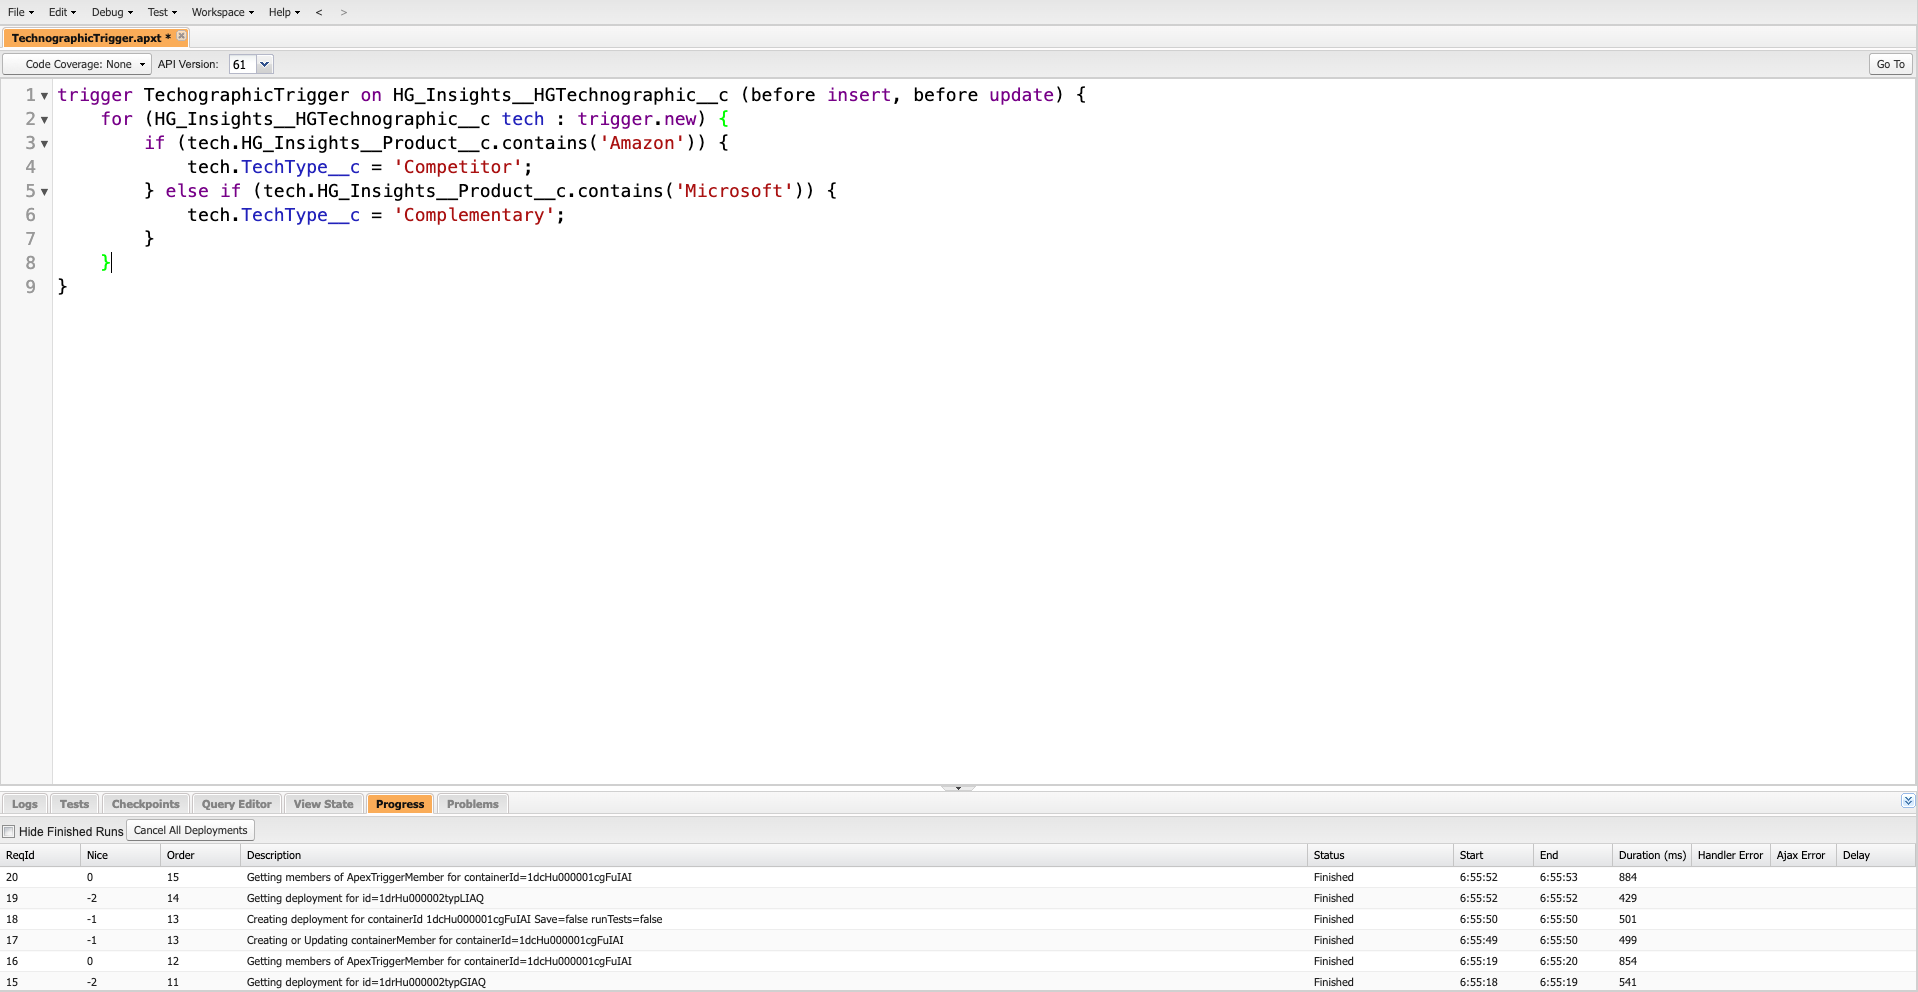
- Reference this sample code
- This is only a sample, product names will need to be updated to match use case
- Once new records are added, this trigger will automatically fire. For existing records that the integration has already updated we'll need to run a batch job (next step).
- If selecting multiple fields, you'll need to use the following syntax for that section of code:
if (tech.HG_Insights__Product__c.contains('Amazon') || tech.HG_Insights__Product__c.contains('Amazon 2')) {
- Remember to File → Save!
trigger TechographicTrigger on HG_Insights__HGTechnographic__c (before insert, before update) {

for (HG_Insights__HGTechnographic__c tech : trigger.new) {

if (tech.HG_Insights__Product__c.contains('Amazon')) {

tech.TechType__c = 'Competitor';

} else if (tech.HG_Insights__Product__c.contains('Microsoft')) {

tech.TechType__c = 'Complementary';

}

}

}
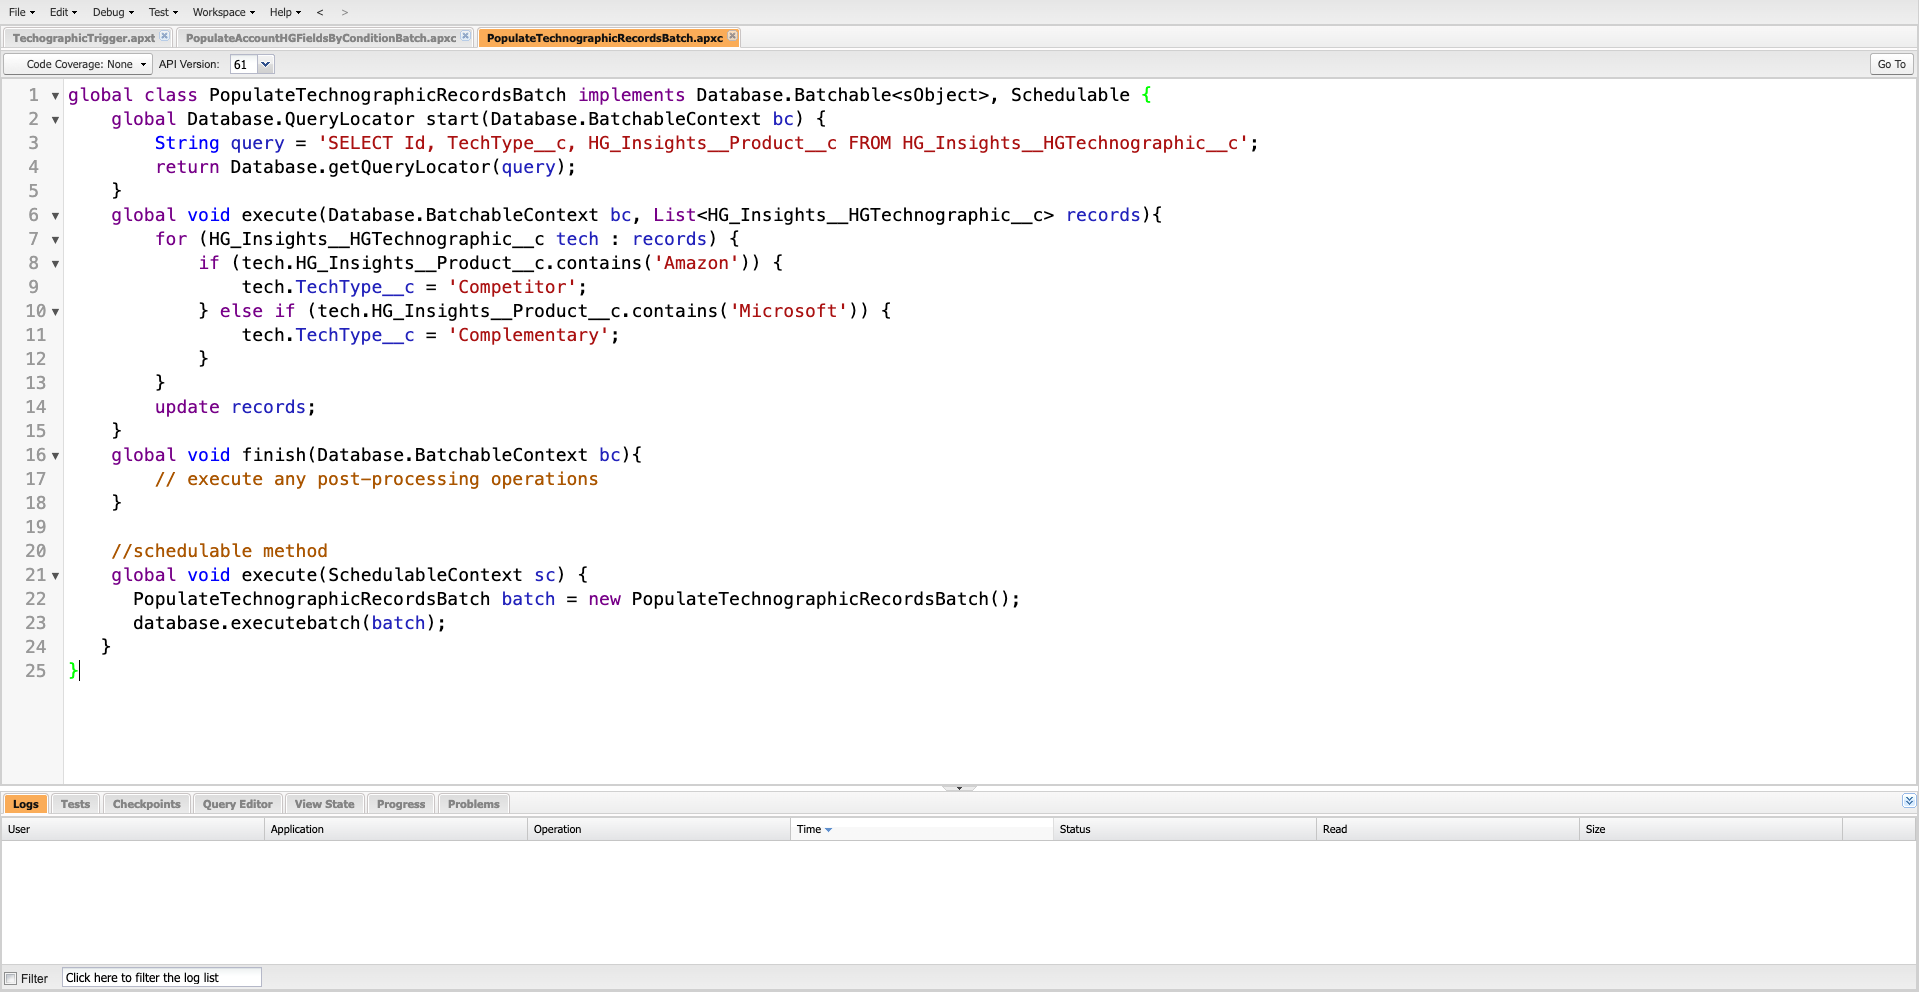
4. Create a new apex class named PopulateTechnographicRecordsBatch and paste below piece of code
- In the Developer Console, select File → New → Apex Class
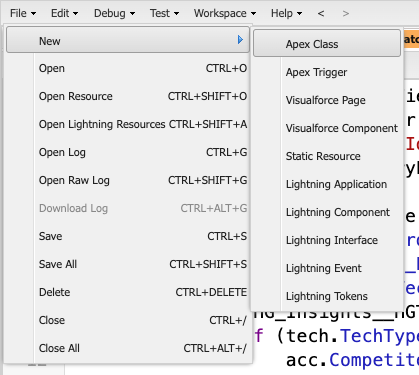
- Name the Apex Class PopulateTechnographicRecordsBatch
- Add the following code
- Remember to File → Save!
global class PopulateTechnographicRecordsBatch implements Database.Batchable, Schedulable {
global Database.QueryLocator start(Database.BatchableContext bc) {
String query = 'SELECT Id, TechType__c, HG_Insights__Product__c FROM HG_Insights__HGTechnographic__c';
return Database.getQueryLocator(query);
}
global void execute(Database.BatchableContext bc, Listrecords){
for (HG_Insights__HGTechnographic__c tech : records) {
if (tech.HG_Insights__Product__c.contains('Amazon')) {
tech.TechType__c = 'Competitor';
} else if (tech.HG_Insights__Product__c.contains('Microsoft')) {
tech.TechType__c = 'Complementary';
}
}
update records;
}
global void finish(Database.BatchableContext bc){
// execute any post-processing operations
}
//schedulable method
global void execute(SchedulableContext sc) {
PopulateTechnographicRecordsBatch batch = new PopulateTechnographicRecordsBatch();
database.executebatch(batch);
}
}
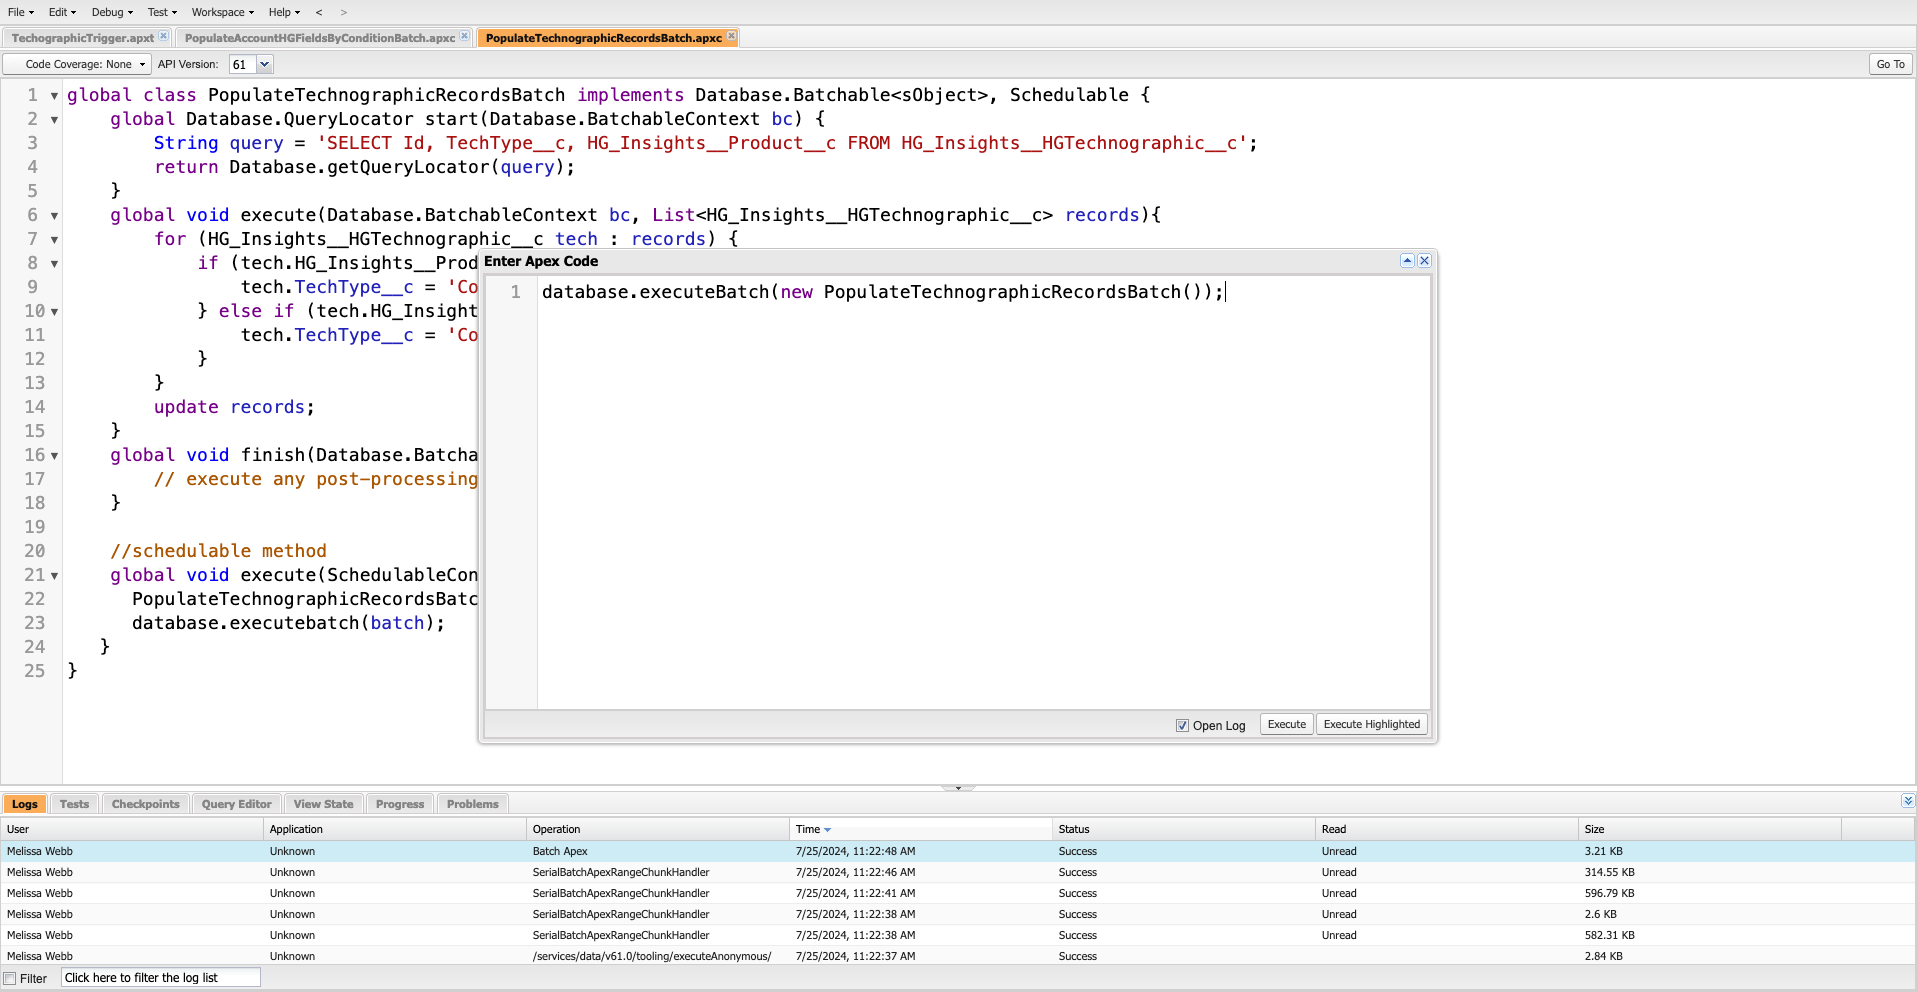
5. Run this batch job to populate the TechType__c field we created on the Technographic object
- In the Developer Console, select Debug → Open Execute Anonymous
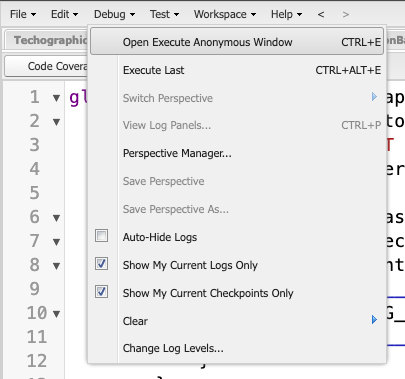
- Add the following code
database.executeBatch(new PopulateTechnographicRecordsBatch()); - Click Execute and confirm success
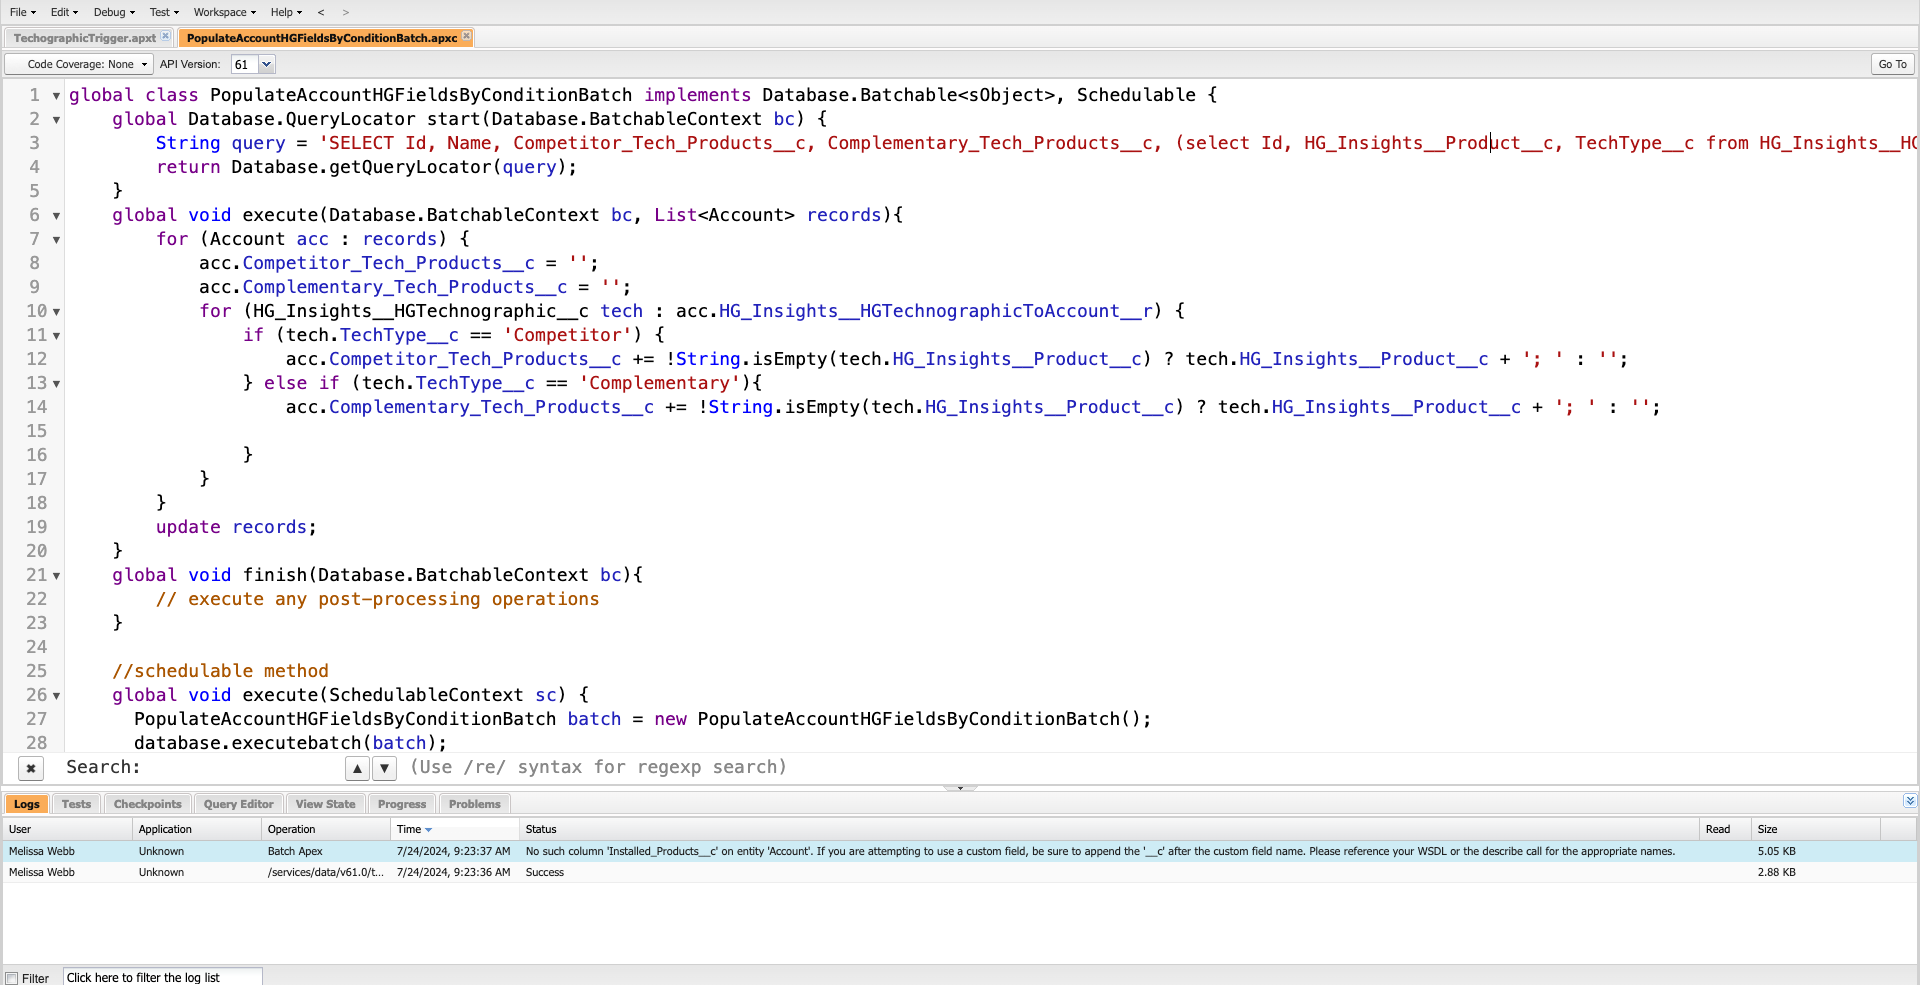
6. Create a new apex class named PopulateAccountHGFieldsByConditionBatch and paste below piece of code
- In the Developer Console, select File → New → Apex Class
- Name the Apex Class PopulateAccountHGFieldsByConditionBatch
- Add the following code
- Remember to File → Save!
global class PopulateAccountHGFieldsByConditionBatch implements Database.Batchable, Schedulable {
global Database.QueryLocator start(Database.BatchableContext bc) {
String query = 'SELECT Id, Name, Competitor_Tech_Products__c, Complementary_Tech_Products__c, (select Id, HG_Insights__Product__c, TechType__c from HG_Insights__HGTechnographicToAccount__r) FROM Account WHERE HG_Insights__HG_Match_Status__c = \'Matched\'';
return Database.getQueryLocator(query);
}
global void execute(Database.BatchableContext bc, Listrecords){
for (Account acc : records) {
acc.Competitor_Tech_Products__c = '';
acc.Complementary_Tech_Products__c = '';
for (HG_Insights__HGTechnographic__c tech : acc.HG_Insights__HGTechnographicToAccount__r) {
if (tech.TechType__c == 'Competitor') {
acc.Competitor_Tech_Products__c += !String.isEmpty(tech.HG_Insights__Product__c) ? tech.HG_Insights__Product__c + '; ' : '';
} else if (tech.TechType__c == 'Complementary'){
acc.Complementary_Tech_Products__c += !String.isEmpty(tech.HG_Insights__Product__c) ? tech.HG_Insights__Product__c + '; ' : '';
}
}
}
update records;
}
global void finish(Database.BatchableContext bc){
// execute any post-processing operations
}
//schedulable method
global void execute(SchedulableContext sc) {
PopulateAccountHGFieldsByConditionBatch batch = new PopulateAccountHGFieldsByConditionBatch();
database.executebatch(batch);
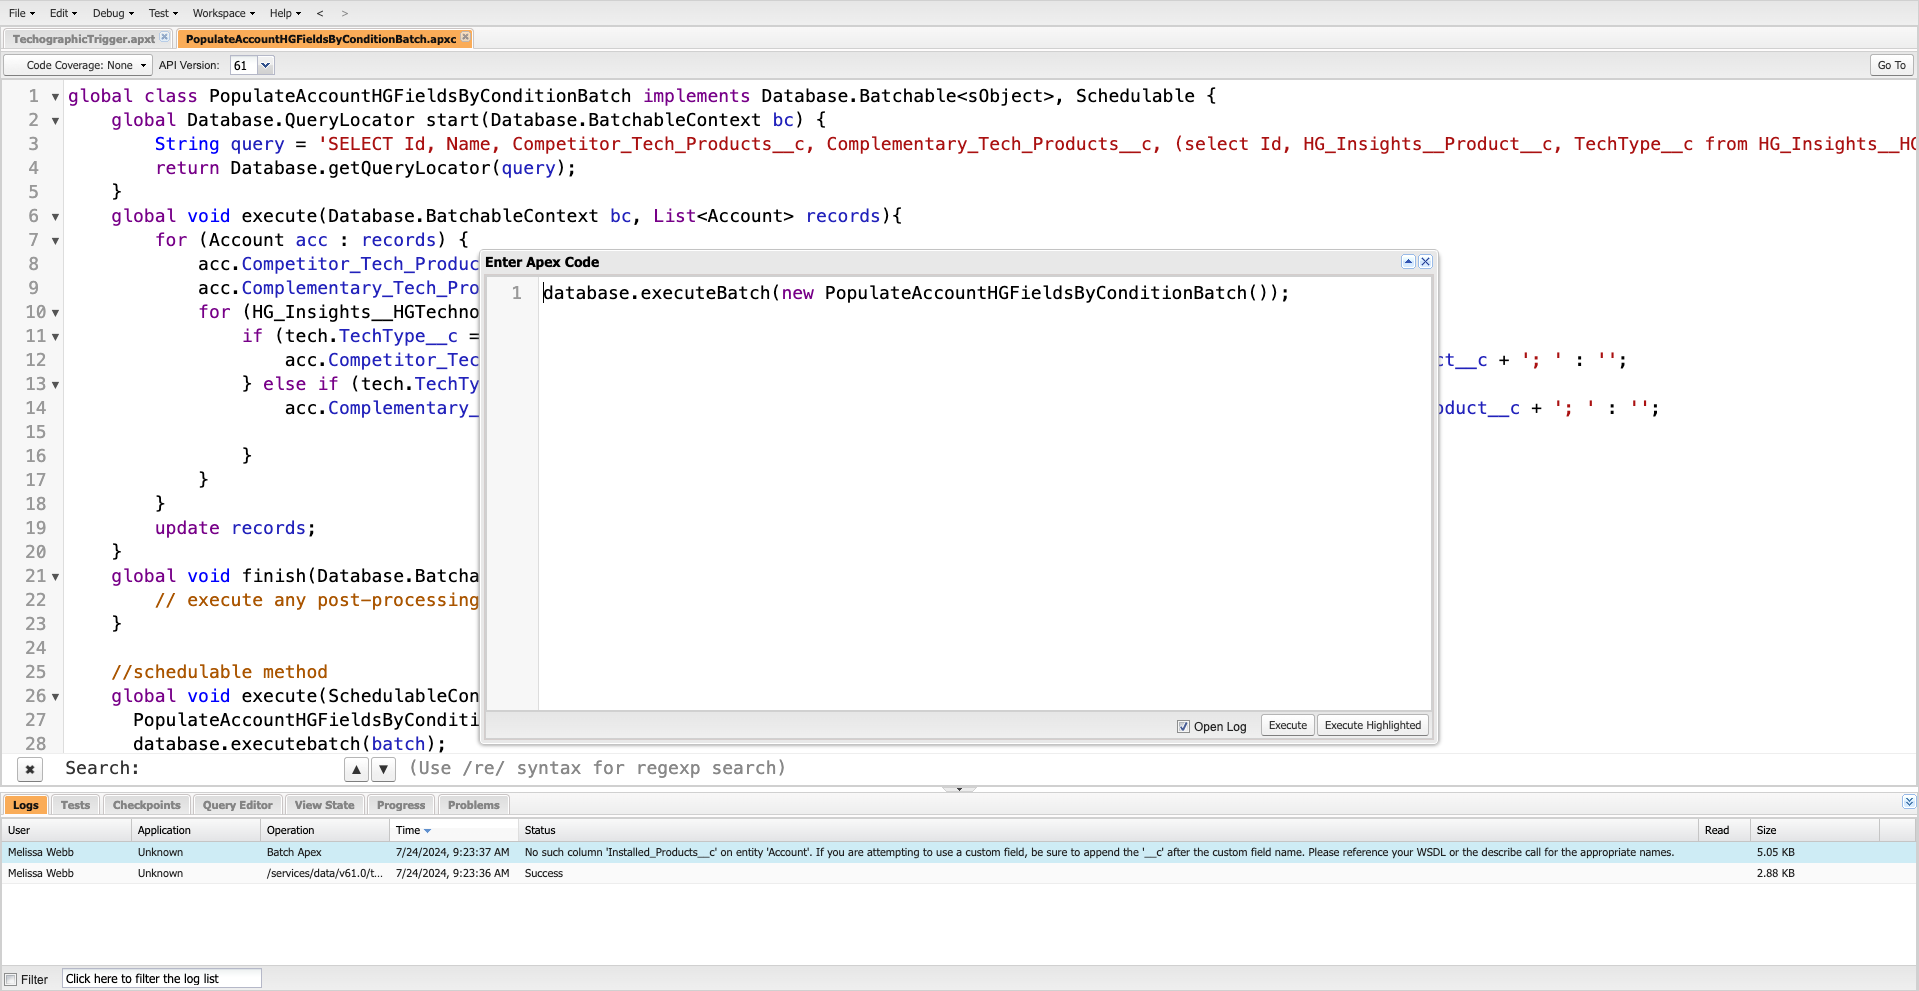
7. Run this batch job to populate the Competitor_Tech_Products__c and Complementary_Tech_Products__c fields we created on the Account
- In the Developer Console, select Debug → Open Execute Anonymous
- Add the following code
database.executeBatch(new PopulateAccountHGFieldsByConditionBatch()); - Click Execute and confirm success
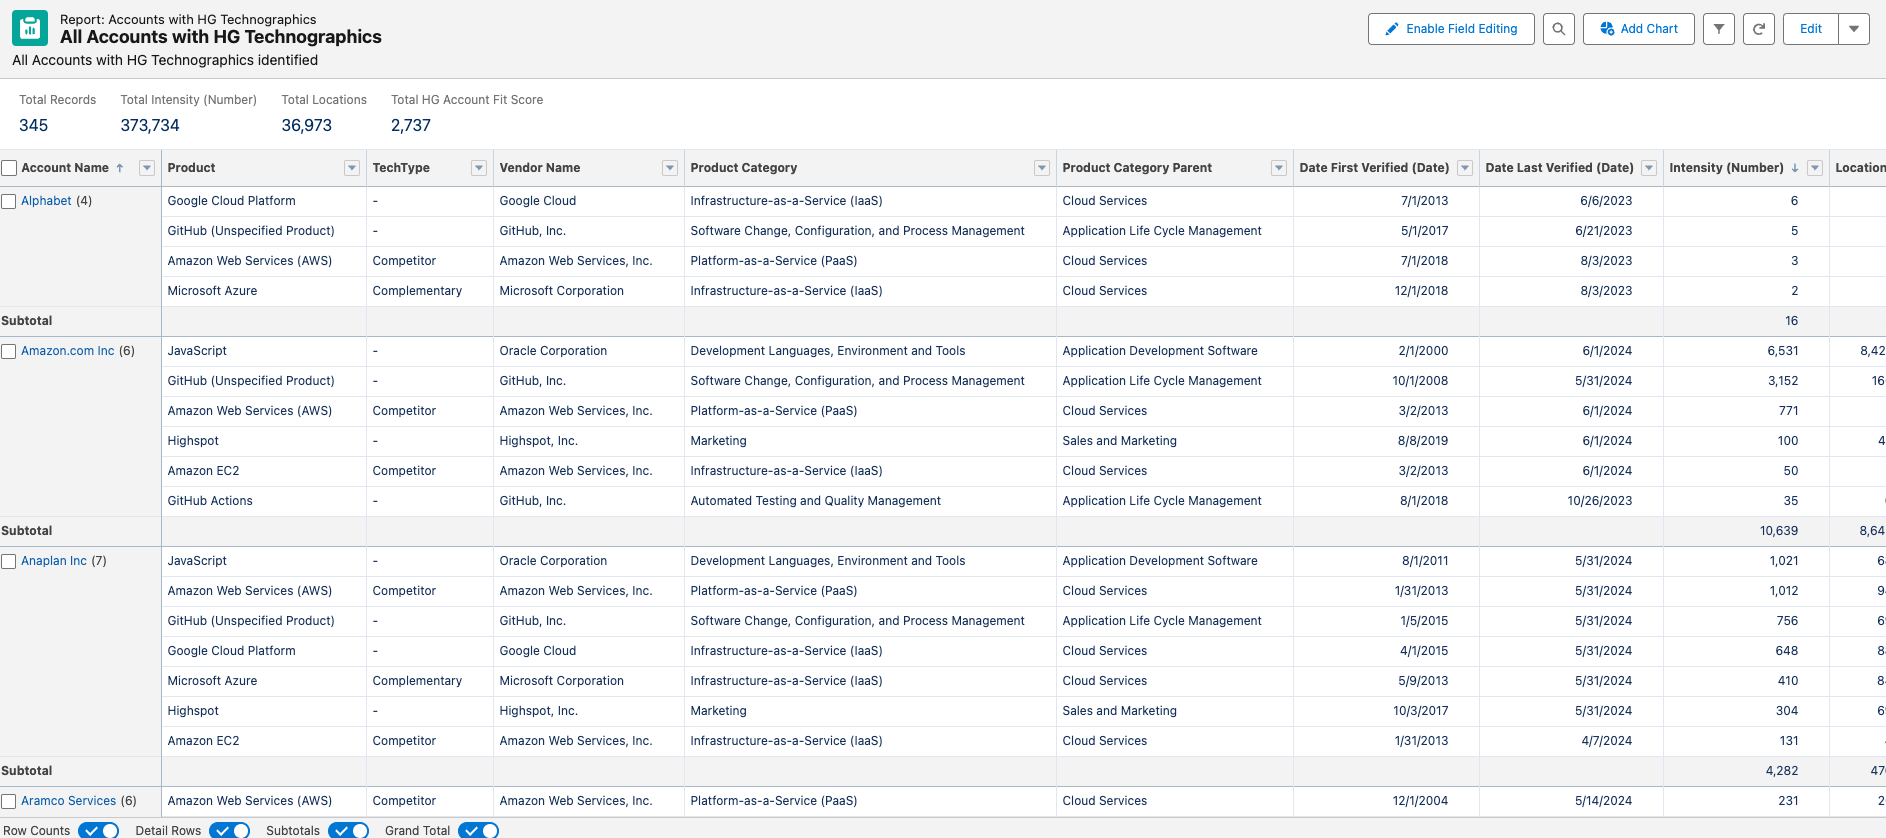
8. Add Competitor_Tech_Products__c and Complementary_Tech_Products__c field to a report or Account page layout and review. You can also view TechType__c in reporting.